Before I was a Rare Book Librarian, I worked as a Stitcher (let's not say "sewer"), and have recently pulled out my sewing machine to make face masks for donation. As of April 3, the Centers for Disease Control and Prevention (CDC) has officially endorsed wearing cloth face masks in public settings. While the gold standard to limit the transmission and spread of COVID-19 remains social distancing, face masks can help – especially since we now know that people who don't feel sick (because they are either presymptomatic or asymptomatic) can still spread the virus.
If you have medical-grade supplies, like N-95 respirators and surgical masks, please donate them to frontline health care workers. You can find a list of most-needed supplies and how to share them with local hospitals in this Philadelphia Inquirer article. Instead, the CDC recommends cloth face masks. There are lots of options! You can make one with nothing more than a t-shirt and two rubber bands (demonstrated in the below video from the United States Surgeon General), or you can use a scarf or bandana to cover your nose and mouth.
But if you know how to sew and have access to a sewing machine, you can make a reusable face mask (or lots of them!) for yourself, your family, your neighbors, and even donate them. A variety of mask patterns can be found via Sew Face Masks Philly, who are one of several Philadelphia-area groups coordinating mask requests and donation pick-ups. Everyone has their own preferences on how to make a face mask but here's the method I use to crank them out.
Don't stress about your fabric options—use what you have! 100% cotton is best, with an eye to balancing how tightly the fabric is woven with the need to, y'know, breathe. Pillowcases are perfect. You'll need something to secure the mask to your face, too. Elastic ear loops are great but I'm speeding up my process by using head ties made from old t-shirts (the bigger the better).
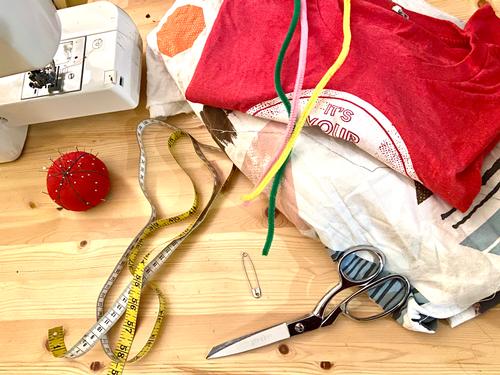
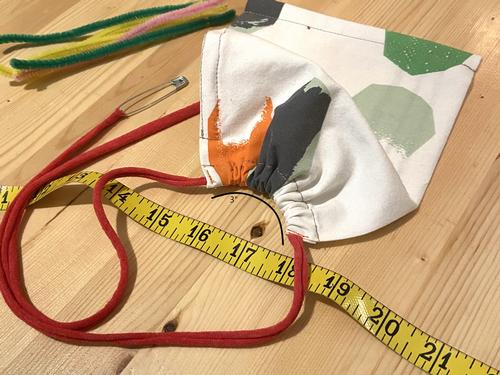
- First, collect your supplies. Fabric, measuring tape, a good pair of scissors, some thread, a sewing machine, a safety pin, maybe some straight pins, and optionally some wire for a nose piece (I use pipe cleaners).
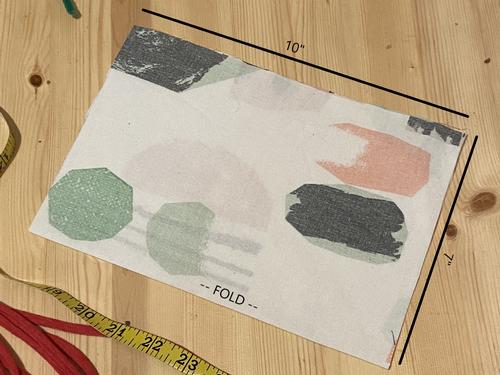
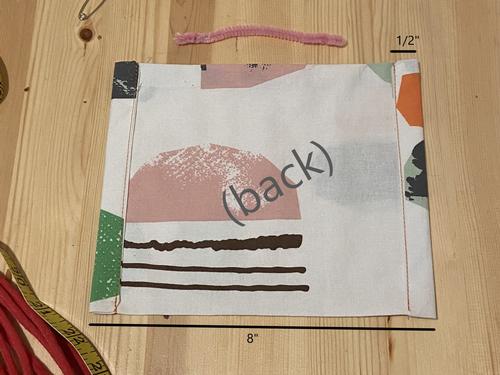
- Cut a rectangle of fabric 14" x 10" (a little smaller for a child, 10" x 8" would work) and fold it in half, right sides together. You'll have a rectangle 7" x 10" and be looking at the "back" side of the pattern.
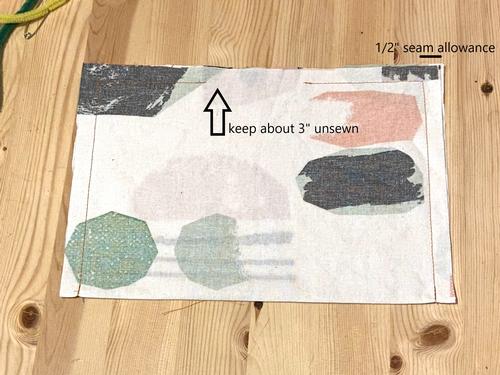
- Sew 1/2" from the edge of the three open sides, but leave about 3" unstitched on the long open side: this is how you'll turn your face mask right-side-out.
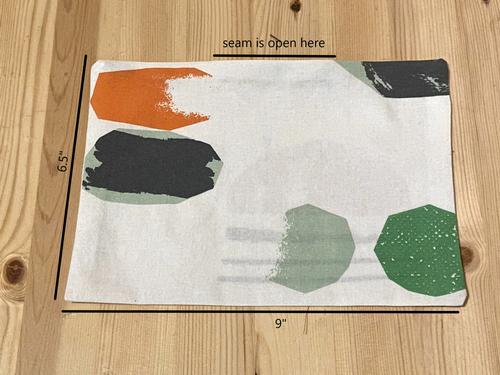
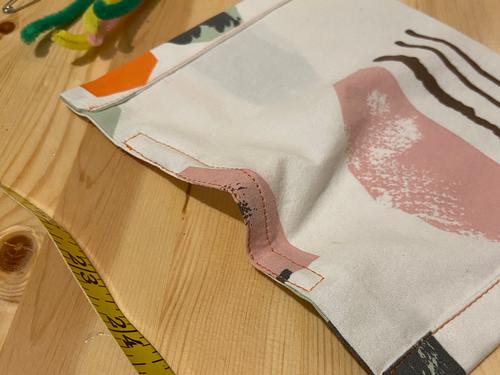
- Turn the face mask right side out. Your rectangle will be two layers of fabric, around 6.5" x 9", with a few inches open at the top.
- Pick the "front" side of your mask and on the back side, fold in 1/2" of the short sides and stitch near the edges to make channels for the ties.
- (Optional wire nose piece) If you'd like a nose piece to help with the fit of the mask (and glasses-fogging), cut 6" or so of pipe cleaner or other thin wire, bending in the pointy ends so you don't stab yourself or the fabric. Insert it in the top opening and stitch around it to keep it in place during wearing and washing.
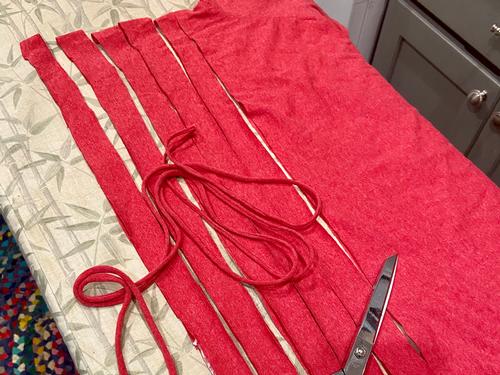
- Make your t-shirt ties. Lay your t-shirt flat, cut off the bottom hem, and slice it into 1" wide strips. You'll have a bunch of loops! Streeeeetch each one out as much as you can; depending on t-shirt starting size you can get loops that are 60-80" in circumference.
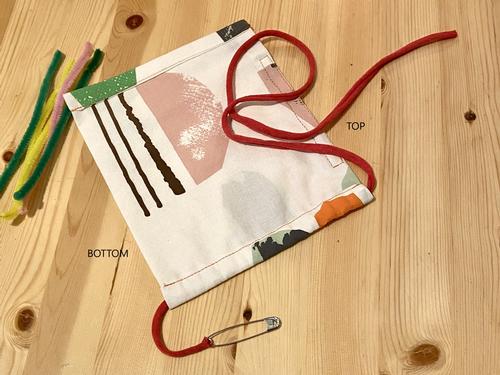
- Cut ties to finished length of 36" or so – longer if you have an XL head. To thread the ties, attach a large safety pin to one end of the tie and thread it through one of the channels, starting at the top of the mask.
- Leave 18" of tie out at top and tack to top of channel. Gather the mask side to 3" (it will be really crumpled) and tack the bottom of the channel. Do the same to the other side.
- Trim your loose threads and feel a sense of accomplishment!
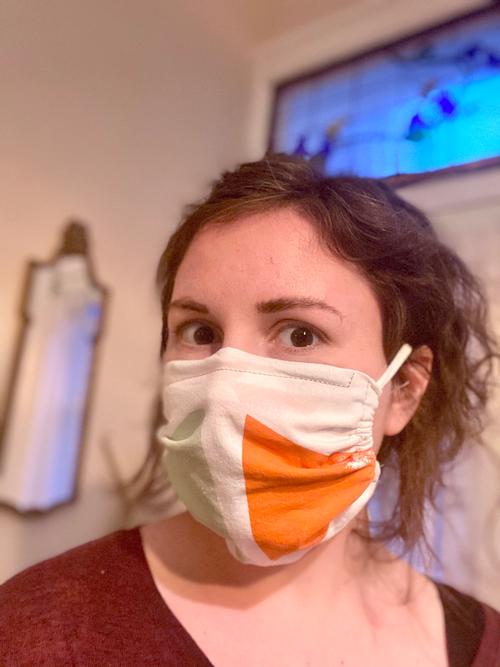
Now that you've made a mask, make sure you follow best practices to wear and remove it. Stay healthy and we'd love to hear about your mask-making experiences in the comments!

Have a question for Free Library staff? Please submit it to our Ask a Librarian page and receive a response within two business days.